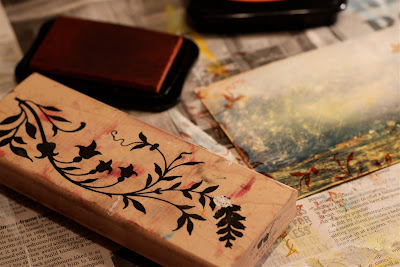
I wanted to start the year off with a tutorial!
I learned the altered photo technique from Karen Michel a few years ago at the Art Bar in Santa Ana, CA. There is something about learning directly from an artist that penetrates deep. I have loved and used this technique so many times and included scratch photos in wall hangings and handmade books and used cut up altered photos as backgrounds for collages or soldered pendants.
So here it goes:
Step 1
Choose the photo you want to alter. It must be a photo that was printed by a professional machine and not an ink jet printer. Choose a photo that has some elements that you want to leave unaltered.

Step 2
First fill a small basin with warm to hot water. Place the photo in the water face down for about a minute.

Step 3
Take the photo out of the water and pat it dry. Don't rub the surface.

Step 4
Immediately, while the photo is damp take a small piece of a sheet of sandpaper to scratch the surface of the photo. Start at the edges and work inwards. Anything you want to leave as normal don't scratch.

Step 5
When you have scratched off all your want you will be left with lot of bits of the emulsion on the surface, they are kind of sticky so it is not easy to wipe them off, so simply dip the photo into the water basin again and the bits will come off. Pat the photo dry again, you are ready to add some color to the photo.

Step 6
Add paint and oil pastels to the photo. I don't put too heavy paint on my photos, rather leaving some of the scratchy surface showing through. I like to blend the paint and pastels with my finger.

Step 7
Then it is time to add some rubber stamps to the photo. I generally use Staz On ink so that it doesn't wipe off.

Step 9
Finally add collage elements to complete the project. As you can see I made this into a small, poetic wall hanging! Details on creating the wall hanging will be in a later post.

*********
And now to today's GIVEAWAY:
Today's giveaway winner, chosen by the Random Number Generator, is -
Katie of Katiesnestingspot
Congratulations!
Pick your prize from the choices below (click on image to see a larger image) and post it in the comments. I will contact you via email so you can send me, privately, your physical address.
Choice #1 - The wall hanging from the tutorial above.

Choice #2 - Little girl's wall hanging.

Choice #3 - This is an altered book with soldered charm. The pages of the book have stamps and the words to my favorite romantic poem by W.B. Yeates
Aedh wishes for the Cloths of Heaven that starts off "Had I the heavens' embroidered cloths..."

For everyone else - Please check back in next Saturday to see if you win something. I will offer a new set of prizes. I will try to offer a range of things in the hopes something will appeal to you when it's your turn!
And of course, if you are not listed as following this blog, you are welcome to do so! Join in the fun.
That looks so cool to do...I may just have to try my hand at one this year...
ReplyDeleteAs always your giveaway is awesome!
Awesome tutorial!!
ReplyDeleteLooks like a fun project to try!
ReplyDeleteWhat a great tutorial Shona!! I'm looking forward to trying this one!
ReplyDeleteThanks for the tutorial...looks like fun and the result is really cool!!
ReplyDeleteHappy New Year!! xOxO Nerina
Thanks for the tutorial, I may try this!
ReplyDeletegreat tutorial and thanks for sharing..like the idea of adding pastels they are one thing that I bought but hardly use so thanks for this..now to look for some photos with heads missing etc!!
ReplyDeleteHi Shona again,
ReplyDeleteJust visited here for first time, and what a wonderfull place to experience ,learn, and feel good.
Love your tutorial.
Dorthe
Congratulations on soon being published! This is my first visit to your blog and I really like it. The tutorial is great, I love altering photos but seldom take the time to develope some of the digital once...
ReplyDeleteHappy New Year
Wow that's awesome Shona, that's great news!!! I'd love to have the wall hanging from the tutorial in this post. Thank you!
ReplyDeletetoo cool! gonna have to give that a try! thanks for sharing!
ReplyDeleteThanks for the show & tell. i must try this one.
ReplyDeleteAmy
So beautiful ! Love your tutorial so much!
ReplyDeleteLove your tutorial and love your artwork, Shona! :)
ReplyDeleteThanks for taking away the mystery out of how this is done. Ever since I've seen your work, I wanted to ask you how to do this. It seems simple enough for even me. I look forward to your post on how to do the wall hanging part. Thanks so much.
ReplyDeleteThank you all for the encouragement and for taking the time to comment. You are making me want to do more and more tutorials!!!
ReplyDeleteShona
Gosh I love your altered photo and tutorial.
ReplyDeleteWhat a fun tutorial it has kept me busy for 2 days now. When I get a bit further I plan to blog about it @shutterbugmuse.com. I have soft pastels in my tool box, yet, I've never worked with the oil pastels. I'm having so much fun! Thanks!
ReplyDeleteStay well my friends!
Lovely!
ReplyDelete