February 28, 2010

Coffee cup holder book & Giveaway #12

I am loving this Green Craft magazine. It lays around my house and I keep on peeking in. I want to use what I have. I want to practice re-purposing. I have never liked waste, wasted food, wasted clothes, wasted paper. Equally I don't like having useless stuff around. I am not a pack rat. So if I make something out of the old I am not wasting and I am making useful. Perfect solution.

It is also perfect for me 'cause, as a busy Mom who lives 20 minutes away driving 50 miles per hour from the nearest craft store, when I need to create I can't just get up and go. I have to use what I have.

So, this time I was inspired by Linda Manning Findley's 'cup holders for Christmas'. She said "You can use the cup holder as a card, tag or small book" - small book, that won me over! I am a sucker for a small book.


So I made these for my girls. I am going to write a poem for each in them.


Here's how:


First - prepare the coffee holder:
1) flatten out the filter and cut the right hand side to make an opening.
2) paint the front with craft paint
3) paint the back, as it has ridges I just dusted, rather than coated the back
4) fold over and stamp on the front, as usual I used Staz On ink, my favorite - you have the bones of your book cover


Second - prepare the decorative image
5) stamp the image onto some painted paper or other colored paper, I used the heart from Clearly Impressed 'Romance Elements' by Christine Adolph
6) Cut out the image and add some paint if needed
7) Run the edges of the image along the ink
8) Glue it on to the center of your book cover


Last - Add the pages
9) use the book cover as a template and cut out 3-4 strips of paper. Fold over in the middle
10) stitch the pages to the cover at the crease in the paper

There you have it:


This photo was taken on a background of new scrapbook paper from Christine Adolph by Creative Imaginations, this will be carried by Stampington & Co.

Thanks to Linda for the inspiration and the permission to post this for you guys!


~~~~~~~~~~~~~~~~~


To thank you for following along with my artful journey & the celebration of the launch of my book I am doing these regular Saturday giveaways!

This week the winner is

Kendall at Finesse Your Nest

Congratulations!

You get to choose one of the following gifts:

Choice #1 - Handmade notebook, aprox 3x6 inches


Choice #2 - 5 painted, randomly stamped papers for you to cut up and use in your own art work


Choice #3 - A wall hanging on a vintage hanger aprox 14x10 inches


If you are not listed as a follower of this blog, please do sign up, the more the merrier!

After this one I will be doing one more giveaways, March 6, to celebrate my book's official publication date (March 8th), even though the book is already available in the US. Then I will take off a few weeks. In April I am going to do 4 Saturday giveaways, the prize being kits that can be used to get started on the workshop in my book! I think that I will open those giveaways to comments so that I can be sure the kits go to folks that are interested in receiving mixed media supplies. I am still mulling it over.

February 25, 2010

Artistic Mother book GROUP and Shannon Mucha's Digital ABC book

There is a group forming to do work through the projects that are in my book 'The Artistic Mother'.

If you want to join in you can. Trudy Callan is the group organizer. She has posted about it on her blog 'Artistic Creations with Trudy'. So if you have the book and want to join in blogging about your progress, keeping accountable to making some family focused art, then visit her and get all the details.

I am so delighted that the book is going to be helpful to other Moms who want to find the time to create! OK, over the moon, speechless, honored. I will be happy to see their artistic interpretations!!!

~~~~~~~~~~~

Check this out:


You have to see this ABC digital book, by illustrator (Artistic Mama and featured artist in my book) Shannon Mucha! She has done amazing illustrations of each letter of the alphabet based on the word's Latin or Greek root.

I love the coloring, the style, her drawings, the texture, the whole idea! I would love a copy of this for my kids as they learn both languages in our school.

I will keep you posted if this is something you will be able to buy one day.

February 23, 2010

Notebook for my son

When I wrote about my struggles with raising my first born son, Dawn left a comment that had such wisdom -
She said "My three boys came after my two girls. Sometimes I felt like I had no idea what I was doing...raising boys.
One thing I did--I kept a little notebook for each of the boys in my drawer and wrote a little something down every day in those notebooks...something I appreciated about them. It made me focus on the good stuff! It improved my attitude when they were challenging. And for me...they were ten times more challenging than the girls.
We survived...and they are now adults with families of their own."

I. Love. This. Idea.

So I have made my own notebook!

Thank you Dawn for sharing this idea with me.


we are good, aren’t we?
my son, pale like milk
a hurricane’s power
passing by everyday

I first bowed to him

but oh my happy hope,
his lyrics
writing my heart

our cage rattles daily
though his cheek is smooth

his face turns towards the world
he will one day breath in

and for this word,
this ancient leaving
that has begun
I prepare

February 20, 2010

Re-purposed onsie & giveaway #11

In honor of my practice of the principles of 'Green Craft' and inspired by Disney of Ruffles and Stuff's re-purposing old clothing comes this weeks project!

Max had this cute blue and white striped onsie that became, let's say, a little too soiled around the leg. I tried soaking and spray & wash to no avail. In order to dress up another plain onsie I made this little fishy:


Here is how:


Step 1 - pick out the old (too small or too stained) garment
Step 2 - draw the design. I got this fishy design from a dingbats font, called Efon that I downloaded for free from dafont.com, then printed it out and traced the drawing. I could have done it free hand, but I really liked this shape.
Step 3 - Cut out the fish drawing and pin to the the old onsie. Cut the fish shape out.
Step 4 - Iron the fish onto some fusible interfacing (to stabilize the fabric for sewing) and trim.
Step 5 - Line the fish up on the new onsie and sew it on with a tight zig zig stitch.
Step 6 - I added a button for the eye.

It was SO quick and simple to do, but so satisfing. The hardest part for me was sewing around the curves, but I think the uneven stitching gives it that 'handmade' appeal. I am not a sewer. I am learning by doing. I believe that if I keep at it one day I will improve.

I love the idea of using supplies that are on hand and not always buying the latest. Check out Brandi Reynolds post over at the Wishstudio on this very topic.

Also see Sewing With Trudy's scarf!

~~~~~~~~~~~~~~~~~~~~

To thank you for following along with my artful journey & the celebration of the launch of my book I am doing these regular Saturday giveaways!

This week the winner is

Kathryn Lantz of Sassmowth Designs

Congratulations!

You get to choose one of the following gifts:

Choice #1 - 12 month old altered onsie & matching gift tag


Choice #2 - mini notebook, 4x4 inches


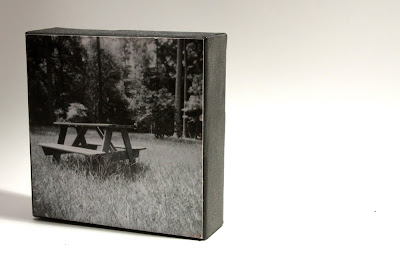
Choice #3 - an original Holga camera print mounted onto a 5x5 inch stretched canvas, sides painted black. Ready to hang.


If you are not listed as a follower of this blog, please do sign up, the more the merrier!

Also, if you would like to win a copy of my book click here, all you have to do is write a post on your blog or on Facebook/twitter about my new book 'The Artistic Mother - A Practical Guide to Fitting Creativity into Your Busy life' which is now available from all major bookstores in the states, (March 8 for other countries). Check here for all the details.

Thanks Mindy for this photo of my book on the shelves in a store in Boston!

I have benefited from and practice everyday the principles I lay out in this book. I think that it can help Moms who want to, but are just not getting around to practicing their artistic skills. I need you to help me spread the word so those that could also benefit from reading it will know about it. I can't go on a book tour or teach classes as I have to be here with the kids, so this is my only venue for telling folks about the book. So anything you can do to help me would be MUCH appreciated.

Thank you for being there to support me, a mom and fellow artist :)

February 18, 2010

Fun photo exercise to do with kids


How to?
1) Bring camera & few kids to park
2) After time on the swings and slides and a few rounds of crazy golf ~ have your kids 'find' letters in the alphabet around the park.
3) Photograph their finds
4) Upload & crop

notes
Activity is best for kids ages 5-12, the younger they are the more mom input will be needed!

This took myself and 3 kids about 40 minutes to do, if time is pressed you can cheat and 'make' the letters - in sand, with shadows, leaves etc.


~~~~~~~~~~~~~~~~~


Check out my article on the similarities between being a mom and being creative over at the wishstudio.


~~~~~~~~~~~~~~~~~

I hate to keep on mentioning it, 'marketing' does not sit well with me, but if I don't tell you how can you know?

So....

to win a copy of my new book 'The Artistic Mother' jump on over here!

February 16, 2010

First baby


for years I lived in this house
unchallenged, unscathed, before your photo
appeared on the fridge, in the frame by the bed,
before your tiny clothes curled in
my drawers, your soiled burp cloths
in the laundry. You made me look below
the surface of things, the dust
of my impatience, my need for sleep,
my inward ways, your eyes

upon the stars of my face, older
somehow, positioned now by your
terrible need. I cradled your uncontrolled
head meekly, pretending I knew how.
Months after you arrived your smile
bubbled through, my gummy
mistakes forgiven, that quick, that complete.


~~~~~~~~~~~~~~~~~

If you want to win a copy of my new book click here!

February 15, 2010

One World One Heart Winner announced!

Wow what a ride! Kudos to Lisa for arranging a great blogger meeting event. I visited literally hundreds of new blogs that I would never have found. I gained a whole bunch of followers here, which is wonderful. More art friends around the world the merrier I say!

Thank you to all who entered my giveaway. I wish everyone could get something....

But the winner of

Journal & stamp # 1


goes to... Pixie of Pink Coyote

Journal & stamp # 2


goes to.... Heather of Bluhm Studios

I will be contacting you soon!


~~~~~~~~~~~~~~~~~

But the giving keeps on going.....

If you want to win a copy of my new book click here!


ALSO, if you want to win something handmade in my Saturday Giveaway then sign up to be a follower!

February 13, 2010

Giveaway #10


This smiling face says 'thank you'. Thank you to everyone who has stopped by to say hello and give me their support and encouragement. I am truly grateful. I know you have other places to be, that you chose to be here, even for a minute makes me feel humbled. I want to visit every single person that comments, but with 5 kiddos and all the art and writing I am doing I can't always make it immediately. So if you have commented or signed up to follow and I have not yet said thank you personally or visited your blog, please know that I DO appreciate it and you are not ignored or forgotten.

On with the giveaway....

This is giveaway #10 on my Saturday giveaways. It is for folks signed up as followers of this blog.

This Saturday Giveaway was a way to count down to the release date of my new book The Artistic Mother - A Practical Guide to Fitting Creativity into Your Busy Schedule. BUT, the US Amazon are already fully stocked and ready to ship. But for folks in other countries the release date is still March 8.

So far I have given away a necklace, 2 pairs of earrings, a wall hanging, mini journal, 2 butterfly reminders and some altered pegs. I have lots more tokens to give away too, so stay with me!

I choose the winner by the random generator. This week the winner is

Nicks of Nicks arty stuff

Congratulations.

Pick your prize from the choices below (click on image to see a larger image) and post it in the comments. I will contact you via email so you can send me, privately, your physical address.

Choice #1 - mini notebook 5x3inches aprox.


Choice #2 - Believe wall hanging, perfect for a little girl's room


Choice #3 - 'Create Daily' butterfly reminder.


For everyone else - Please check back in next Saturday to see if you win something. I will offer a new set of prizes. I will try to offer a range of things in the hopes something will appeal to you when it's your turn! And thank you for being a part of 'An Artful Life'.

And of course, if you are not listed as following this blog, you are welcome to do so! Join in the fun.

~~~~~~~~~~~~~~~~~

Also, if you want to win a copy of my new book click here!

February 12, 2010

Valentine's Day Green bag/envelope Tutorial

In the latest issue of Stampington's Green Craft Vol. 2, I just love, love, loved this heart bag by Becky Shander. It is made out of brown paper grocery bags! I don't normally use paper, I'm more of a plastic Momma (sometime I want to try that 'fused plastic' technique from Green Craft Vol. 1) But after I saw this magazine and was at the store picking up just a couple of things I decided to get paper bags instead.


So I made a heart bag myself following Becky's directions:


Step 1 ~ Gather any brown paper sacks that you got when grocery shopping. Cut the front and back panel and lay one on top of the other on your work table.
Step 2 ~Draw a large heart on one side of the brown paper. Hold the 2 pieces together and cut the heart shape out.
Step 3 ~ Sew the 2 pieces together leaving an opening at the top. NOTE - I don't know if it was just my sewing machine, but the stitches facing up horrible (as you can see), but when I turned it over after I had already collaged it, I found the stitches were perfect. So after you sew look at both sides and decorate the one with the better stitches. Oh and sewing on this paper broke my needle, so be prepared!
Step 4 ~ Color the heart with pastels. Blend the pastels with your finger. NOTE: Becky used chalk to color hers and I think that worked better than my oil pastels, chalk spread better and looks more romantic.


Step 5 ~ Gather some decorative paper and fabric scraps for a collage. (The heart is what is left over from when I added foil to a Sticky2 heart)
Step 6 ~ Arrange and then glue down your collage in the center of the heart.
Step 7 ~ Add some rubber stamps with Staz On ink. This stamp is from the Romance Heart Cube by Stampington & Co.
Step 8 ~ Punch 2 holes in the top of the heart.


Step 9 ~ Cut a long piece of 28 gauge jewelry wire (I love wire, it is so cheap, only a couple of $ per spool and this light gauge cuts even with a scissors, so no need for any jewelry tools and can be used for lots of projects)
Step 10 ~ Slip this wire into one of the holes thread it onto a bead. I doubled the wire up.
Step 11 ~ Twist to secure.
Step 12 ~ Add beads by twisting them onto the wire along the handle.


Step 13 ~ Add charmed to one strand of wire.
Step 14 ~ Add fibers to one part of the handle.


This was my favorite type of craft to make - simple but very cute. I am going to use it as an envelope for my husband's VD card. Then I went ahead and made some mini ones to give to my kids this Valentines Day, filled with candy hearts and a little love note!


Thanks so much to Becky for the inspiration! Go check out her blog, it is lovely.

February 11, 2010

Win a Copy of The Artistic Mother


* This contest is now closed *

Go here to find out the winner!

The Artistic Mother has been released in the US a month before schedule. I want to inspire as many Moms as possible to fit creativity into their day, so I am giving away a free book.

If you want to win a copy of The Artistic Mother, simply do a blog/Facebook post about it sometime between now and Monday March 1.

*Leave a link to your post in THIS email*

In your blog post, simply
1) add the image of the book you can take off this post
2) add link to my blog (http://shonastudio.blogspot.com/)
3) add a link to a book store where it can be purchased, like Amazon (the cheapest option I think. Check this post for international options).


You can write your own post or borrow it from any of these post about the book. Your post can be as long or short as you wish, along as the links are there! (if you need help with links, let me know).

If you have already pre-ordered/purchased it at a bookstore or want to go ahead and order it today, you are still eligible to win ~ you can donate the 2nd copy to the library or give it to a friend or you can choose to get my Celtic inspired soldered charm bracelet:


Thank you for helping me spread the word!

~~~~~~~~~~~~~~

I will also be doing a book giveaway in March at the Wishstudio.

Also, I will continue my Saturday follower's giveaway as planned.

February 10, 2010

US Amazon have released my book!

My friend Christi, who pre-ordered the book, left me a comment in my last post saying that Amazon has shipped it to her! Later she emailed to tell me she got her copy!

Then I saw this post on FB:


I am floored! It was meant to be released in March, but somehow they have copies already. I checked the other book store links and they still all say March 2010.

So, if you live in the US you can order my book, now!

~~~~~~~~~~~~~~

I was going to do a special blog giveaway for folks to win a copy of my book later in the month, but this changes things..... so check in tomorrow for your chance to win a copy of the book!

February 08, 2010

Artistic Mother - Intro Part 2, how the book came to be


I thought I would share with you a little about how I got my break into the world of being an author and one big lesson that I learned!

In 2005 I made it my goal to meet every theme challenge in Stampington & Co.'s Somerset Studio magazines. I would find out the challenge and the deadline and go about making something for it, mail it off and then look for the next challenge! At first some of my pieces were published in the Reader's Expression section of Somerset Studio. Eventually I was invited to do the With One Stamp section, With One color section and the Last Page article. Soon enough I got the chance to be one of Stampington's Artists On Call.

So after about 2 years of this I had regular assignments and publication opportunities. One of those was an article in Somerset Memories in 2007. It was that article about on doing art & raising kids that caught the eye of the Acquisitions Editor at North Light Books.

One afternoon Tonia Davenport read my article while on her lunch break. She emailed me and asked if I had ever thought about doing a book!

I said yes of course! In reality I had thought a book would be something I would pursue when my kids were grown, but here was my chance! That weekend I bounced around some ideas with my friend Erin and then wrote up my proposal on a date with my husband at Starbucks.

I sent it off and waited. A few weeks later I got the go ahead. They liked my idea!

So I planned, I wrote and created the projects. After I went to the North Light offices in Cincinnati for the project photoshoot the editing process begun. My original manuscript was a messy tome that my editor, Liz Casler had to reign in, bless her heart.

Once the designer got it I was pretty much out of the loop. Marissa Bowers did a beautiful job. I was tickled when she wrote on Facebook:


How is that for kudos? The best feeling.

The one thing I have learned is that you need to be doing the work so that when the opportunity comes along you are ready to take it. I was working diligently at my mixed media work night after night in my spare hours. I never missed a challenge. I kept doing it regardless of whether my pieces were published or not (yes, I have sent Stampington way more stuff that they have published!). I formed my own vision of what I wanted to do with art, all the while keeping my regular home life ticking along. I kept at it, so when I got that fateful email I didn't have to scramble. I didn't even really know that I was ready, but the work I had done made me ready!

'So keep at it!' I remind myself, you never know when the next opportunity will arise.

February 06, 2010

Giveaway #9 & Green Craft Wreath

****For those here for the One Heart One World giveaway, this is a different one!****

As I mentioned last week, I picked up a copy of Green Craft, Vol 2 by Stampington & Co. It is really a lovely issue. As a busy mom of little kids, if I want to make something and I don't have the supplies I can't just drop everything and go to Hobby Lobby. So I use a limited number of supplies in my art and use everything I have. So the whole re-purposing and altering idea really suits me.


In this issue Lana Manis of the blog Honeysuckle lane made this 'whimsical wreath' out of old book paper.


It is so lovely that I totally wanted to make one. So I followed her steps for making my own. Mine turned out a little on the rough & uneven side. You should check out Lana's blog, she does some amazingly perfect wreaths. Puts mine to shame! But is was a fun thing to make, so I am forging ahead and showing you my version.

So these are the steps that Lana laid out to make this wreath. In honor of valentines day which is fast approaching I made mine into a valentine wreath!


Step 1 - Draw a circle on some cardboard
Step 2 - Cut it out
Step 3 - Cover the circle with glue
Step 4 - Cover the circle with old book paper. Trim. Repeat for other side of circle


*excuse my coupon background newspaper! I had no idea it would be so distracting. Lesson learned :)

Step 5 - Cut or tear out a whole bunch of pages from an old book. Lana suggests about 60 pieces, mine was smaller so I had about 30.
Step 6 & 7 - Start to roll the paper into a cone. To make shorter cones roll on the longer side, for longer cones roll on the shorter side (this makes sense once you are rolling)
Step 8 - Staple the cone. Repeat for all your cones. This is a fun step to do while watching a movie!


Step 9 & 10 - Lay the longer cones out on the covered circle. I used spray glue, spraying below the cone and then above it as I went
Step 11 - The cones can be a little springy, so to make sure they were sticking I used the top of a glass jar to press the cones in place (my tip ;)
Step 12 - Lay a second layer of shorter cones over this bottom layer in the same way.


Step 13 - Once the cones are all stuck, flip it over and pick out a hanger. Lana used wire, I used some ribbon.
Step 14 - I glued a small paper circle over the ribbon and laid something heavy to make sure the ribbon stuck on (but not too heavy as to crush your cones)
Step 15 - Cut out a collage for the front. I cut a circle out of a pre-made collage with a heart (this had been going to be a journal, but the colors were perfect for this wreath's center!)
Step 16 - Perhaps layer the circle on another circle of old book paper and tear around it. Glue this to the center of your cone wreath to hide all the messy cone staples!

And there you have your valentine wreath:


Thank you to Lana and Amanda Crabtree, editor of Stampington & Co. Green Craft for giving me permission to post this based on Lana's design :)

~~~~~~~~~~~~~~~~~

And now for this week's giveaway:

This is giveaway #9 on my Saturday giveaways. It is for folks signed up as followers of this blog. And there are so many new folks on the list this time. I attribute this mainly to One World One Heart, the (still on going) giveaway hosted by Lisa of A Whimsical Bohemian. I have 'met' so many new artists on this magic carpet ride, I have entered many, many giveaways myself and really hope to win something! We'll see. Anyhow, welcome to all the new followers :)

This Saturday Giveaway is a way for us to count down to the release date of my new book The Artistic Mother - A Practical Guide to Fitting Creativity into Your Busy Schedule (March 8, 2010).

So far I have given away a necklace, earrings, a wall hanging, mini journal, 2 butterfly reminders and some altered pegs. I have lots more tokens to give away too, so stay with me!

I choose the winner by the random generator. This week the winner is

Joanie of Full of Bolognie!

Congratulations.

Pick your prize from the choices below (click on image to see a larger image) and post it in the comments. I will contact you via email so you can send me, privately, your physical address.

Choice #1 - sepia colored soldered earrings


Choice #2 - an altered board book with soldered & beaded hanger, includes the words to a Yeats poem that begins 'Had I the Heaven's....' you know the one!


Choice #3 - my latest bound journal. this one is 4x4 inches with blank pages.


For everyone else - Please check back in next Saturday to see if you win something. I will offer a new set of prizes. I will try to offer a range of things in the hopes something will appeal to you when it's your turn! And thank you for being a part of 'An Artful Life'.

And of course, if you are not listed as following this blog, you are welcome to do so! Join in the fun.

LinkWithin

Related Posts with Thumbnails

Search This Blog