March 30, 2010

My Private Project Runway


Of course I am waiting
outside on the rickety
turquoise garden chair
they will appear
out of the doorway, fashioned up -
beads, wings, layers, flounces
all lavender and cowboy boots
solemn faced and tottering

We watched 'Project Runway' finale show
and now they want to be
models, designers, sewers

But, oh to be these children!
the sun shining on their
spring collection shoulders
their hair unbrushed
costumes not new
in their minds
they are the beautiful models
the clever designers
the smiling hope
of the fashion industry
my girls, who in dreams
are 5'10


*************


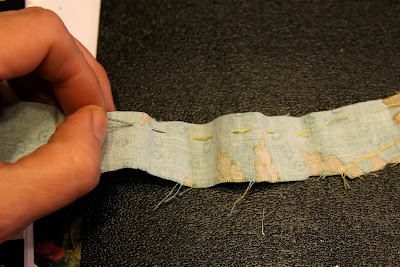
Thank you to Jannie Funster for her blog giveway! I won this copy of Billy Collins, The Art of Drowning. There is nothing like a break on the porch in spring when school is done for the day and the kids are playing happily together, the baby is asleep and I have a poetry book to read! Life is fully delightful then.


*************

If you want to know how art can make you be a better Mom please visit my March article at the Wishstudio today!

Also, I am a 'Guest Curator' on CRESCENDOh this week! Follow this link: if you want to read my Art Saves article on CRESCENDOh.

On CRESCENDOh's main page each day this week I am linking to 2 wonderful artists. So please visit my links there, you will be inspired by them.

March 29, 2010

Published in Stampers' Sampler


I just love the new look of Stampers' Sampler Magazine by Stampington & Co. You have to check it out. Even though I have been an Artist On Call for them for 3 years now I never get tired of finding out that something I made will make it into print! I was so delighted to get this magazine in the mail and find out I was a part of it.

The photography in this publication is top notch and they show so much more of the cards. That is not to mention the lovely layout. Really big improvement. Kudos to Amanda Crabtree, the editor and her team.


Here is my two page spread. I made a series of these cards using Jenny Doh's new stamp line. I did a post about making one of these cards a while ago.


I saved one of the cards for myself:


*************

I am so unhappy that Blogger has, in it's bid to improve itself, taken away the HTML editing capacity. I like to see my photos big and to do so I was manually changing the size in HTML - it was working just fine. Then on Friday I got an email talking about 'blogger in draft' and some new templates that let you do more without HTML. But the templates don't work for big pictures, so I kept my old template but have found that in the old template the HTML option is now GONE. So now I can't make them bigger (well, I did drag them bigger but they looked pixelated, horrible!). Has any one else come across this? It is just me? Is there a solution?

UPDATE - got it sorted, thanks to Peggy and Trudy for pointing me in the right direction!!!! Somehow I had switched editing mode in settings to 'Hide composite mode' which does not have HTML and needed to switch back to the 'updated editor' which does. I was able to do that in settings. phew!

*************

Oh and check out these articles:

1) I am a 'Guest Curator' on CRESCENDOh this week! My Art Saves article on CRESCENDOh, getting down and personal!

Also on the main page each day this week I am linking to 2 wonderful artists. So please visit my links there, you will be inspired by them.

2) Please visit a wonderful book review and recommendation by Disney of Ruffles and Stuff. She has lots of great quotes from folks at Trudy's Artistic Mother Group! Thanks Disney (and Trudy for the group, have I said thank you enough?)!

If you are visiting from either of these places, I welcome you, stay a while, visit, leave me a note to say hello! I do try to visit everyone who visits me.

And if you want some cool (free) mixed media supplies - remember to check back here on Saturday to sign up to win my book's Starter kit!

March 27, 2010

Poetry Journals

In the workshop in my book, The Artistic Mother, Week 2, I recommend decorating your own poetry journal.

I have lots of journals. I keep a decorated journal in almost every room in my house! I even have one in my diaper bag so if a poem or even some words or lines come to my mind I am not without paper!

Some of my journals are for poetic words, but sometimes I use them to write down my thoughts, rants, ideas, lists, musings, prayers. I find by taking the time to stop and write my mind becomes clearer and I can 'see' what I mean, where I am going, what I should do.

Anyhow, here are some poetry journals I have made using the principles that I outline p74-75 of 'my book'


Here are some details and ideas for when you make your own:


If you have made a poetic journal based on the ideas in my book, would you consider posting them on the Artistic Mother Flickr group? Some folks have already done just that and it is so fun to see how lovely they are turning out.

Others are part of a community coordinated by Trudy over at Artistic Creations with Trudy! She has done an amazing job of getting a group of women together (over 70 now!) who are going through the workshop in my book! Members are posting their work on their blogs and then supporting each others creative journey. I enjoy jumping from Trudy's blog to the group member's blogs listed on her side bar too see how they are getting on. This beyond what I imagined this book could be!!!

*************

April is coming and every Saturday in April I will be giving away 'starter kits' for my book :) I got some of the supplies in the mail yesterday and I am so excited with what will be included. I will post a photo of the goodies next week (the oil pastels are on back order and won't ship until Monday, and the photo would not look good without my beloved oil pastels!).


*************

Hey, if you are out in a book store this weekend and you see a copy of my book on the shelf, will you take a picture and send it to me? - I will add it to my 'book sightings' photo album on the Artistic Mother Facebook Fan page. The shot does not have to be art, camera phone pic is totally fine! It is just fun to see where the book is popping up.

Much appreciated!

March 26, 2010

Studio Magazine Giveaway winner!


The winner of this magazine: Studios by Cloth Paper Scissors is Eden of Artful Fairy Tales.

Congrats! I can get your address via email and get this in the mail to you.

Thank you to every one who entered the giveaway and have me or added me to your blog roll. I so appreciate it!


~~~~~~~~~~~~~~~

I thought I would share this image from our house last night:

March 25, 2010

Introducing kids to 'The Arts' - a visual chronicle!

THROUGH FINE ART & POETRY BOOKS


thanks to Matthew for the photos, you did really well son :)


GOING TO MUSEUMS/ART EXHIBITS (& buying the catalog for later browsing)


WATCHING ART HISTORY DVDS


TAKING ONLINE PAINTING CLASSES


TAKING PIANO LESSONS


DOING CRAFTS & OTHER ART ACTIVITIES


THROUGH SKETCHING


GOING TO THE THEATRE (& Opera)


CONSTANTLY PLAYING MUSIC AND WATCHING HOMEMADE DANCE & DRAMA SHOWS


DISPLAYING ART IN YOUR HOME


MODELING (ie. Seeing Mommy doing art)


& of course including discussions about and references to art, photography, music, dance, literature, poetry as part of normal daily life!

Does that about cover it? What other ways do you introduce your kids/grandkids to art?

March 22, 2010

Collage practice (using ATCs)


When I first started doing mixed media one of the first tasks I set myself was to make mini collages on a whole set of playing cards or ATCs. (ATC stands for Artist Trading Card. It is a little piece of art (2x3.5 inches) that is not generally sold, but traded between artists.) After 52 individual collages I had done a whole lot of practice! By practicing, a little each day, my eye was being trained to see both good & bad composition and color choices.

I think this exercise is good
1) if you are new to collage
2) when you have made new background papers (as outlined in Week 1 of the workshop in my book) and you want a little warm up before you get into collaging bigger things like journals or wall hangings.
3) if you are feeling a little blocked and just want to make something


Step 1
Lay a playing card onto a white sheet of paper. Draw around the card. Using a kraft knife cut along the line and discard the inner piece. You are left with an ATC size viewfinder. Set this aside for a minute.


***** Suggestion - you can do this for larger cards too, just make your window bigger! *****

Step 2

Spread out your background papers and then tear and cut them up into smaller pieces.


Step 3

Lay your viewfinder on the spread and move it around, sliding different papers under the view finder and looking at the various compositions that appear in the window.


Step 4

When you ‘find’ a paper combo that is nice, tear off the pieces that you like. Arrange them on an actual playing card. (unless you take a photo of what you saw in the viewfinder and are very careful the actual ATC pieces will not be an exact match, it is more of a guide)


***** tip: when arranging the pieces look for heavier pieces to be at the bottom of the piece, avoid too many different colors and strong images, mix elements that are different sizes, but in the same or complimentary color family. *****


Step 5

Glue these in place.


Step 6

Turn the card face down and trim the excess papers.


***** tip: save all the cut off bits and add them to your ‘art stash’ (see p55 in my book for more on 'art stash') *****


Step 7

Add oil pastels to the edges and pick some words or sentiment.


Viola!

You can use ATC’s as the focal image in cards or wall hangings. Here I paired it with a photo of my daughter, layered the ATC over some more painted papers, and that over scrapbooking panel mounted on a piece of cardboard:
(this beautiful background paper on the wall hanging and the background to my photo are from the Mon Ami Collection by Christine Adolph for Stampington & Co.)


or you can make them into mini journal covers, like this one that has a stitched binding:


or this one made with the Bind It All machine:


I hope you enjoy my collage tutorials!


~~~~~~~~~~~~~~~~~


Remember my Studios magazine giveaway, it closes Thursday.
March 20, 2010

Green Craft frayed flowers


I fell in love with these fabric flowers by Maize Hutton (Maize, what a lovely name) in Green Craft magazine Vol. 2 as soon as I saw them. I really wanted to have a go at making one, but I am not a big flower wearer. Then it dawned on me that I could use the flowers to embellish my tote bag! This tote is another version of the one in my book, The Artistic Mother!


So I followed Maize's steps and this is what I came up with:


Step 1
First I cut a strip of fabric 1 x 36 inches.


Step 2
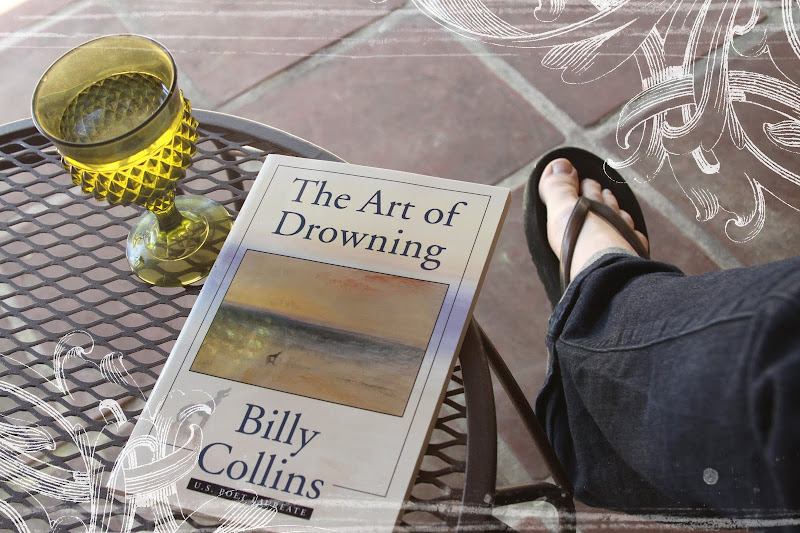
Then folded one end over and put a stitch in it.


Step 3

I sewed a running stitch all the way along the top of the strip.


Step 4
And pulled the thread and gathered the strip into a circle. I had to avoid the temptation to pull it too tight. I kept it loose and let the fabric find it's way.


Step 5
I loosely sewed the 'flower' in place.


Step 6
I took a while to choose a button for the center, color choice, color choice *sigh* Finally, I sewed it onto the center of the flower.


Step 7
I pinned it on my tote bag!

Here is the before and after, I think this tote bag was just waiting for this flower!


(yes, that is that grumpy little Shona photo I keep using. I have my reasons :)

Thank you Maize for the inspiration!


************

Remember to enter my Studio's magazine giveaway!


************

And coming in April I will be doing a weekly giveaway of 'starter kits' for my book, which will include supplies that will get your started on the projects in my book - included in the starter kits will be gesso, water soluble oil pastels, 4B pencil, some papers decorated by me and more!

LinkWithin

Related Posts with Thumbnails

Search This Blog