January 30, 2010

Giveaway #8

****For those here for the One Heart One World giveaway, this is a different one!****

This is giveaway #8 on my Saturday giveaways. It is for folks signed up as followers of this blog. It is a way for us to count down to the release date of my new book The Artistic Mother - A Practical Guide to Fitting Creativity into Your Busy Schedule (March 8, 2010).

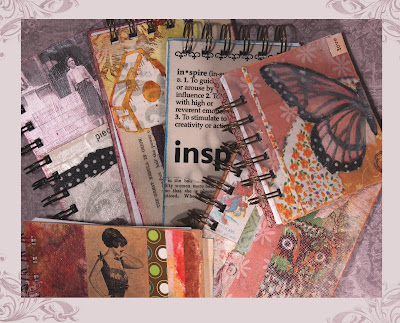
So far I have given away a necklace, earrings, a wall hanging, mini journal, 2 butterfly reminders and some altered pegs. I have lots more tokens to give away too, so stay with me! This week I am offering some more of the journals I recently made using the bind it machine!

I choose the winner by the random generator. This week the winner is

Stacy of My Artful Life

Congratulations.

Pick your prize from the choices below (click on image to see a larger image) and post it in the comments. I will contact you via email so you can send me, privately, your physical address.

Choice #1 -


Choice #2 -


Choice #3 -


For everyone else - Please check back in next Saturday to see if you win something. I will offer a new set of prizes. I will try to offer a range of things in the hopes something will appeal to you when it's your turn! And thank you for being a part of 'An Artful Life'.

And of course, if you are not listed as following this blog, you are welcome to do so! Join in the fun.

~~~~~~~~~~~

Upcoming on this blog:
1) I am going to be posting a little about my book, probably on Monday's. I want to give folks an idea of what is in my book, the Artistic Mother, what to expect, how to use it, who's the target audience etc.

2) I have been thinking about what I want to make and also what tutorials I want to do for this blog. Then last night at Barnes and Nobles I picked up the latest Stampington & Co. Green Craft, Vol 2 and bingo, I knew what I wanted to do - Green Crafts!

Yes, I am going to be making some stuff based on the art in that magazine. I will take photos as I go and post them here! I am so excited right now about this idea!! I hope you will join me on my green craft journey.

January 28, 2010

Quick and easy handmade book that you can do with your kids!

(If you are here for the One World One Heart giveaway click here or scroll WAY down)

My girls like to do what mommy does. I think it is important for them to see me making things and then not turn them away when they want to make one too!

This is a very easy little handmade book that my kids were able to make also. For the tutorial I will show you my version of the book, but below are some photos of the ones my girls ages 8,6 & 4 made (along with my thoughts about working with kids).

Step 1

Trim a piece of card stock to aprox 4x6 inches (I used heavy duty scrapbook paper). Fold in half.

Step 2

Pick a photo of yourself when you were young or a picture of your child. Print it on to Matte photo paper. Trim. Decorate the photo with pastels, blend them with your finger.

Step 3

Optional - Sew the photo onto a piece of painted or scrapbook paper. (Alternatively, you can simply glue it on)

Step 4

Lay the layered image onto the book cover. Add some collage elements. Here I added some left over scrapbook paper and rick a rack.

Step 5

If the cardstock you are using for the book cover is not double side, then you will need to cover the reverse side. Simply spread glue all over the back of the cardstock. Make sure you get glue in the very corner, there is nothing as unprofessional looking as coming apart edges.

Step 6

Lay a piece of old book page paper on the glue. Burnish with your hand.

Step 7


Trim the excess paper with a craft knife on a self healing mat.

Step 8

To make the inner pages, simply trim some cardstock or paper slight smaller than the cover of your minibook.

Step 9

Optional - Decorate your inner pages with strips of scrapbook paper.

Step 10

Stack your inner pages and punch holes (I needed 3 to fit my size book) on the left hand side.

Step 11

Use an inner page to mark on the book cover where the holes should be. Make holes through the back cover with an awl (or even a cooking skewer).

Step 12


Add brads to secure the pages to the mini book!

Step 13
Optional - To create a little closure glue a piece of embroidery thread to the inner back cover (I covered it with a strip of decorative paper). Affix a brad to the front cover. To close wrap the thread around the brad.

Voila!

I know I look grumpy in this photo, but it is a photo that is dear to my heart for a lot of reasons.

Here are my girl's books.

Aren't they so playful and fun? Laura did the photoshoot set up on this! I was a bit worried about her spreading glitter all around my light box, but oh well, I do own a dust pan and brush!

Here are some thoughts about working with the little ones:


Yes it is messy, sticky and they jostle for supplies and scissors and who is going to be first. But worth it!

Picking out the photos to use:

I let my kids look over my shoulder as I scrolled through photos of them so they could choose the photo to use. I set the photos up to print in Word and let them 'catch' the paper as it comes out.

Cutting:
When using the paper trimmer I generally lined up the paper and then let them run the blade when they had seen me do it a few times. Annie,4 was not able to press down as she ran the blade, so I had to re-do hers.
I always do the craft knife cutting for them. As an alternative this time they used a regular scissors to trim the edges. You may note from the picture of the girls books that Laura’s book is a little wonky, well that is because she cut her own book! Annie’s trimming was mainly done by me.

Collaging the cover:
I have a basket of old papers that I no longer want that are dedicated to the girls. They first looked through that basket for collage materials and then I let them look through my stash, they cut things up into smaller pieces as they looked. I talked to them about color and picking papers as we worked. Designing the collage was the longest part of this process.

Glue:
I had to really encourage them to glue the corners well, but I generally let them do their own gluing, but often had to add glue to Annie’s pieces as she just couldn’t put enough glue on. She got very frustrated with her sticky fingers.

Hole punching:
None of my girls could use the hole punch through multiple papers. Annie wandered off at this point and wanted mommy to finish her book! I did the skewering too.

Brads:

It is good for their dexterity to put their own brads into the holes. This took a while to do, but they were pleased when their books were done and immediately ran off to show daddy (who works at home and gets to see their creations and accomplishments all day long :)

I have to share this:

They had so much fun they end up making a collage out of the baby!


Max is such a sweet sport!

January 27, 2010

Studios - a must for Moms


On February 23 Cloth Paper Scissors 'Studios' will be in stores. It is available for pre-order now.

If you are an artsy crafty Mom YOU HAVE TO GET THIS magazine. While the magazine on the whole will be wonderful and inspiring ~ I have not seen the rest of it, only this section: there is an article, written by Jenn Mason which I contributed to, called 'Kids in the studio'. I am telling you, it is fabulous. The photos are all of my art studio taken by Shannon Mucha. She did an awesome job, thank you Shan.

I love that the whole discussion of Moms doing art while kids are around is getting some attention. Our kids are such a huge part of our lives, sometimes it is hard to separate the two parts of us - the mom and the artist. There are the intellectual and emotional concepts, but also the practical considerations too. In this Cloth Paper Scissors publication Jenn did a wonderful job of fleshing out the practicalities of kids being in your art studio. I know I still have young kids, but I wish I could have read this years ago and been prepared!

~~~~~~~~

Check back in tomorrow for another collage related tutorial. It is a fairly simple project that I did with my kids and I will show you how :)

January 26, 2010

I crave stories


faintly on the edge of stories
that tumble about in our minds
alive with possibilities
shooing away the plain footsteps
of again and again. Stories
on the fringe of songs that lie low
chanting peacefully to themselves,
invisible loves caressing
in time with our living. Stories
gold tinged, shy and beautiful
that seep into the crevices
of everyday life, like evening’s
warm glow before the lights come on.

January 25, 2010

One World One Heart giveaway

Photo

THIS GIVEAWAY IS NOW CLOSED.

Welcome to my One World One Heart giveaway.

This giveaway is for bloggers all over the globe.

***** UPDATE *****
Thank you to all those who signed up for my giveaway! I had no idea it was going to be this BIG of an event!
And thank you to the new folks who have signed up to follow my blog. Check in Saturday to see if you win my weekly Saturday 'follower' giveaway.


******

GIVEAWAY PRIZE #1

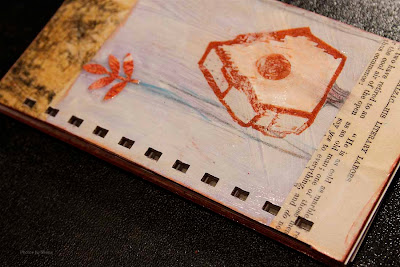
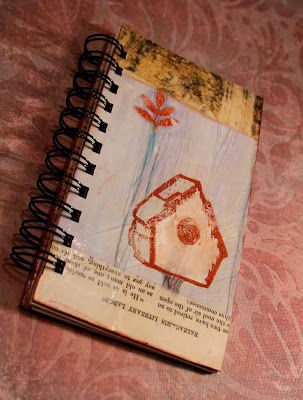
I am giving away this mini journal I made (you can see my post about binding this book below (or here)). It is 6 1/2 x 3 inches with blank pages inside. I am also including the hand carved stamp that I used in the cover collage. That way you can make something to coordinate with the book, a little book mark or notecards or something else fun and creative!


I carved this stamp from this photo of a birdhouse that is hanging in my garden (my son made this bird feeder from a kit!).


As you can see the stamp is gently used :)


GIVEAWAY PRIZE #2

I made this card that I did a tutorial about into a little notebook (can't decide if these are notebooks or journals). I am including the 'Hope' stamp with the book. This stamp is from the Jenny Doh line of stamps and is a clear, unmounted stamp that need to be mounted on something to be used (an acrylic block or the back of another stamp works well). Again, this stamp is gently used and the reason it is not 'clean' is cause I mainly use Staz On ink which can stain the rubber if you don't clean it with a special cleaner, which I am out of!!! gasp! This is the reality of most of my stamps, luckily they work well anyhow :)


To enter please leave a comment in this post between now and February 15. As this is a blog event, you need to be a blogger to enter.

The winner will be drawn by random generator and announced on Feb 15th.

The creator and host of this event, Lisa, said that this is about meeting fellow bloggers from around the globe. If you want to read more about One Heart One World here at Lisa's site).

If you don't know me and want the short 'get to know you' version here it goes:

Name - Shona Cole

Home - Texas, USA

Birth year & place - London, England 1972 (you can do the math on my age :)

Marital status - Married since 1995 to Mark, the love of my life, an American who whisked me away from my home in Dublin, Ireland

Children - 5 beauties ages 10 and under that I photograph a lot

Occupation - homeschool mom, Artist on Call for Stampington & Co., author of the book 'The Artistic Mother'

Interests
- art, photography, poetry, motherhood, discovering a connection between all of those and meeting like-minds (ie. YOU)

So leave me a note to enter my giveaway and if you have time let me know a little about yourself :)

Have a lovely ride through the other blogs via One Heart One World.

~~~~~~~~

Note to my regulars: This giveaway is different from my Saturday 'followers' giveaway! You are welcome to enter this one too, just leave a comment!

January 23, 2010

Bind It tutorial & Giveaway #7

Hello, my name is Shona and I am addicted to my Bind It machine.


Yes it is true. I want to make journals out of every collage I make. Someone stop me!

No don't :) I am having too much fun.


I thought I would show you how simple this machine is to use. The process can be fitted into spurts of work here and there, which is the perfect activity for a busy momma:

Step 1

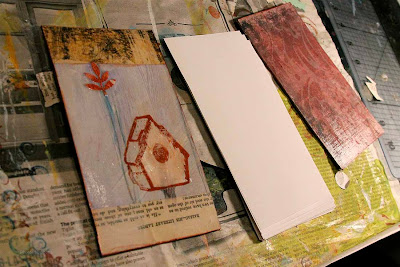
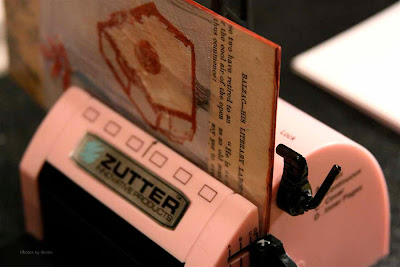
Create the journal cover, back and inner pages. Here I collaged a piece of cardboard with paint, stamps, paper from an old book, a punched leaf, pastels and 10 layers of varnish. The inside and back have scrapbook paper glue on and varnished. The inner pages are the same size as the cover pages – I simply cut up a small stack of printer paper.

Step 2

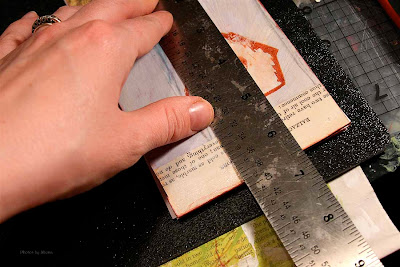
Measure the side you want your journal to be bound on. Mine is 6 ½ inches long.

Step 3


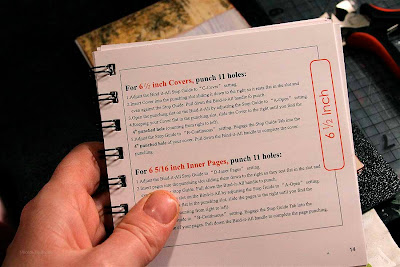
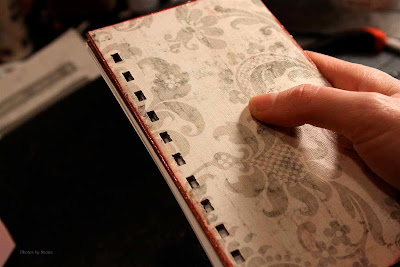
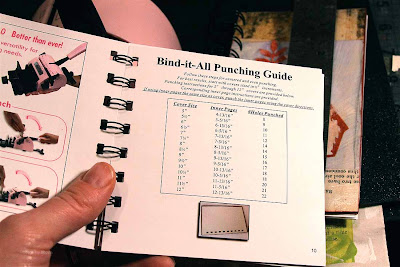
Consult your Bind It guide book on how many holes to punch and follow their instructions:

Step 4

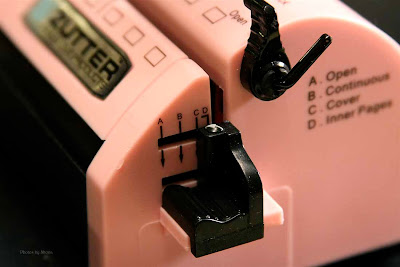
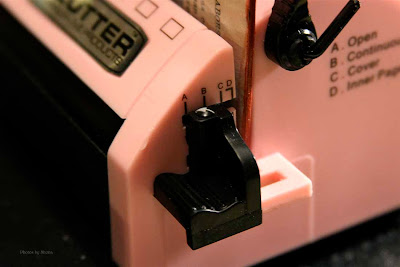
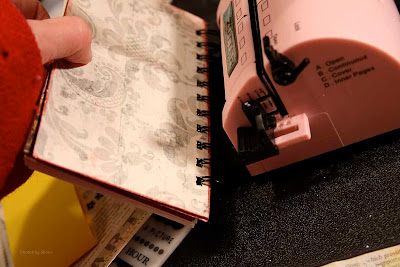
Set your Bind it dial to C

Step 5

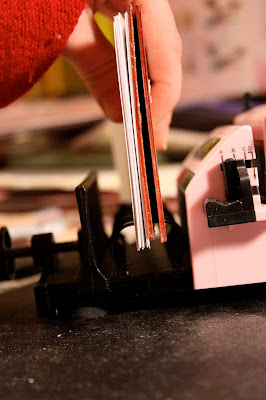
Put the journal cover in to the machine and pull have the lever to punch the holes. Do the same for the inner sheets and back cover.

Step 6

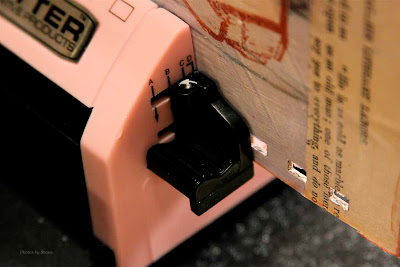
Set your Bind it machine to A.

Step 7

Slide the cover towards you leaving the required number of holes visible (you can find out how many holes to leave by following the guide book for your size journal). Now, set your Bind It dial to B. This pushes a little notch into the hole to keep the book steady so you can punch the remaining holes in the right place. Pull the leaver again punching the remaining holes in the cover. Repeat for the inner pages and back cover. (This sounds more complicated than it is)

Step 8

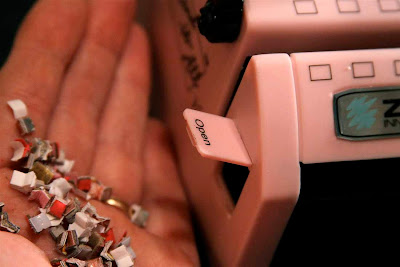
Empty the chamber of the punched paper.

Step 9

Assemble your journal.

Step 10


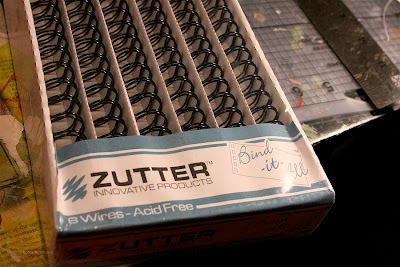
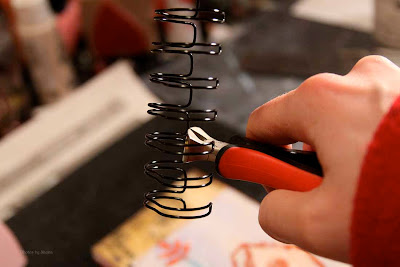
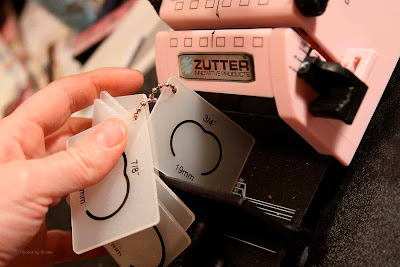
Trim your Bind It wire to the correct number of holes your journal has.

Step 11


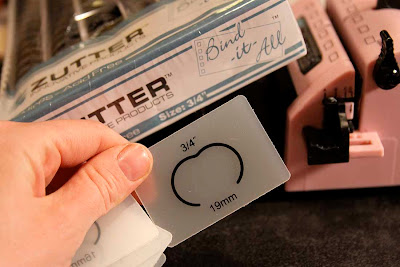
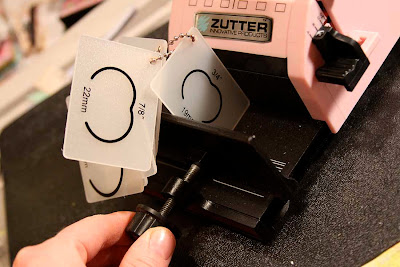
Depending on the size your wire is, place the guide key into the Bind It machine.

Step 12

Turn the screw until the guide key fits snuggly in the tray. Remove the guide key.

Step 13

Take your journal and rotate the back cover up onto the front cover.

Step 14

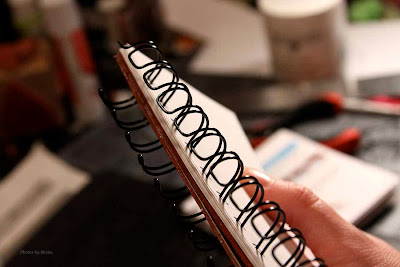
Thread the wires through the holes on the journal from the inner pages through to the cover.

Step 15


Place the wires open side down into the Bind It tray. Pull the lever down to close the wires. Take your journal out and swing the back cover to the back.

Finished!


It seems like a whole lot of steps, but once you get the hang of it you can bind a journal in minutes.

I am offering this journal in a new Giveaway that I am participating in – One World One Heart. It starts this Monday January 25th.

Photo

As a bonus I am including in this giveaway the birdfeeder stamp that I made from a photo of a bird feeder which my son made and which hangs in my garden! You do not have to be a follower to sign up for that giveaway – just leave a comment to be entered. So check back in on Monday.

``````````````````

On with today's giveaway!
And this week it is......

Lisa of LifeUnity

Congratulations!

Pick your prize from the choices below, these are the three my girls chose for you (click on image to see a larger image) and post it in the comments. I will contact you via email so you can send me, privately, your physical address.

Choice #1 - Mini Journal 7x3 3/4 inches


Choice #2 - Mini Journal 4x5 1/2 inches


Choice #3 - Mini Journal 4x4 inches


For everyone else - Please check back in next Saturday to see if you win something. I will offer a new set of prizes. And thank you for being a part of 'An Artful Life'.

And of course, if you are not listed as following this blog, you are welcome to do so! Join in the fun.

LinkWithin

Related Posts with Thumbnails

Search This Blog